
How to Use A Rotavator

What is a Rotavator?
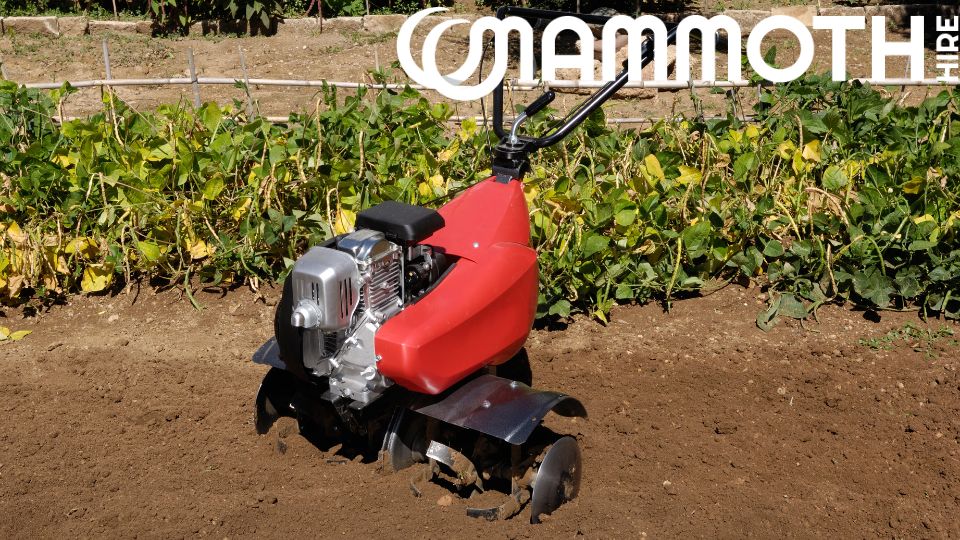
Rotavators are powerful pieces of gardening machinery used to churn and aerate the soil prior to planting seeds, bulbs or laying turf. A powerful set of blades or rotors spin and break through the soil, allowing oxygen into the soil. This aeration of the soil is vital for the growing of vegetables and crops and improves drainage, helping plant growth. Not just confined to industrial farming fields, Rotavators can be used in domestic gardens, allotments, and smaller vegetable patches.
Benefits of a Rotavator
Whether you are researching for your farm or allotment; the benefits of a Rotavator are universal:
- Breaks the soil and prevents clods of earth from forming
- It prepares the seedbed for sowing.
- Reduces time and fuel costs in preparing the soil. E.g., irrigation
- Most efficient preparation of the soil
How to choose a Rotavator
Rotavators come in all shapes and sizes, and the type you choose will depend on the size and type of land on which you are working. There are three main variations of Rotavators:
Soil Tillers:
These are a smaller and lightweight version, ideal for preparing flower beds and small garden areas. They can be simple pieces of equipment that can be stored in sheds and packed into cars for the allotment. They are great for loosening the soil and allowing for better drainage.
Soil Cultivators (Medium duty Rotavator):
These are slightly larger and much more powerful than a tiller. These are ideal for gardens and allotments.
Heavy Duty Rotavator:
Designed for larger plots of land such as farmed land and fields. These are powerful pieces of equipment for often difficult terrain. Hired or bought outright, these are a worthwhile investment for large areas of land.
Preparing to use a Rotavator
You’ve chosen your Rotavator, and you are ready to prepare your land. Before using it there are some important checks you should make, to ensure you get the best from your Rotavator:
Soil Moisture-
Depending on the history of the soil (whether it has been tilled before), as well as it is composition, a Rotavator will behave differently on different types of soil. Consider these factors about your soil:
Clay Soil:
If clay soil is very dry, it becomes hard making it more difficult for the tiller to overturn the soil. In hard clay soil, the rotavator may only be able to scrape a top layer off.
Over-Saturated soil:
If the soil is too wet, it will form clods. Once these clods dry, it can ruin the soil
Compacted Soil:
If your soil has never been tilled (you can tell this because it will be compacted), it will be difficult to till. To change this problem, water the land 3-4 days before tilling, then check to see if the soil has drained enough to be tilled.
A good tip for checking if the soil is ready is by picking up a handful of soil from the bottom of a hole and squeezing it into a ball. If it is correct, it should break apart easily. If it just dents, it is too moist to till.
Remove weeds and large rocks
Before rotavating new ground, you should remove any weeds a few days prior. If you don’t remove weeds, they can get caught in the rotavator’s tines and be spread across the land.
Removing large rocks will also make your job easier. The machine will not jolt or stop as much and there will be less danger of rocks flying back and hitting you!
How to Use a Rotavator
Once the ground is prepared, you can begin to work on the soil with the Rotavator.
- You should rotavate the land in strips, slightly overlapping with the previous strip as you move onto the next strip. Make 2-3 passes over each strip.
- Repeat this process at right angles to the original rotavated strip.
- Pushing down on the rotavators handlebars allows you to control how big a bite the rotavator takes.
- Don’t dig much deeper than 2-3 inches deep on the first strip. Gradually, set the rotavator to dig deeper on the subsequent passes.
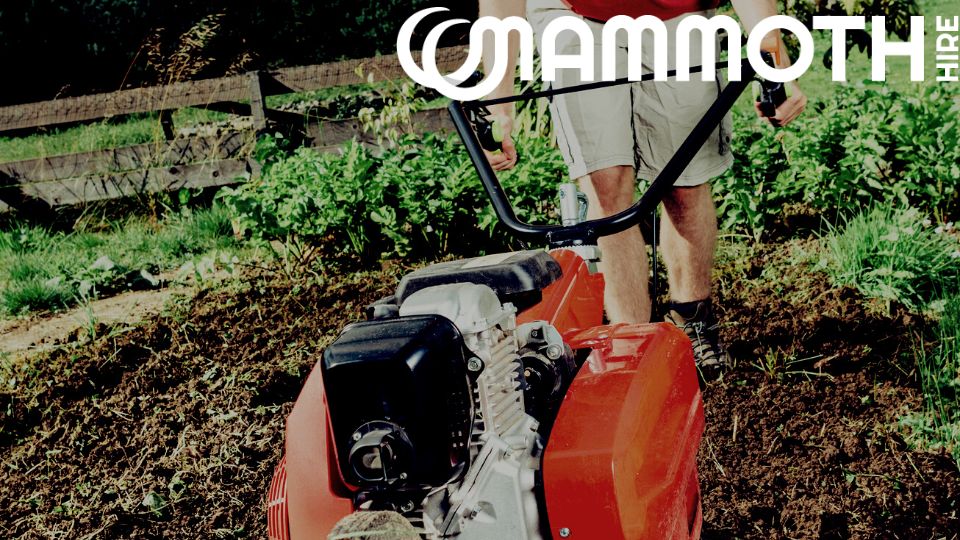
Safety tips when using a Rotavator
Relax!
Tillers and Rotavators can buck and gyrate whilst working. Using physical strength to control one, will make you tired quickly and could cause muscle injury. Instead, RELAX! – and guide the rotavator back on track if it meets something hard in the soil.
Safety gear:
Wear appropriate safety gear when using a Rotavator, such as gloves, glasses and often, ear plugs. Rotavators can throw rocks up as it turns the soil.
Feet and Hands!
Always Keep your feet away from the Rotavator blades- always use appropriate shoes, so your feet are protected.
Be prepared, Soil!
A Rotavator of any size will be an essential addition to any gardener or farmer's land prep. The tough blades churn and aerate the soil making it perfect for sowing crops! Whether it’s your carefully curated home flower beds, vegetable allotments or farmed fields, ensure the soil is prepared for all your grand plans, with a rotavator.

